
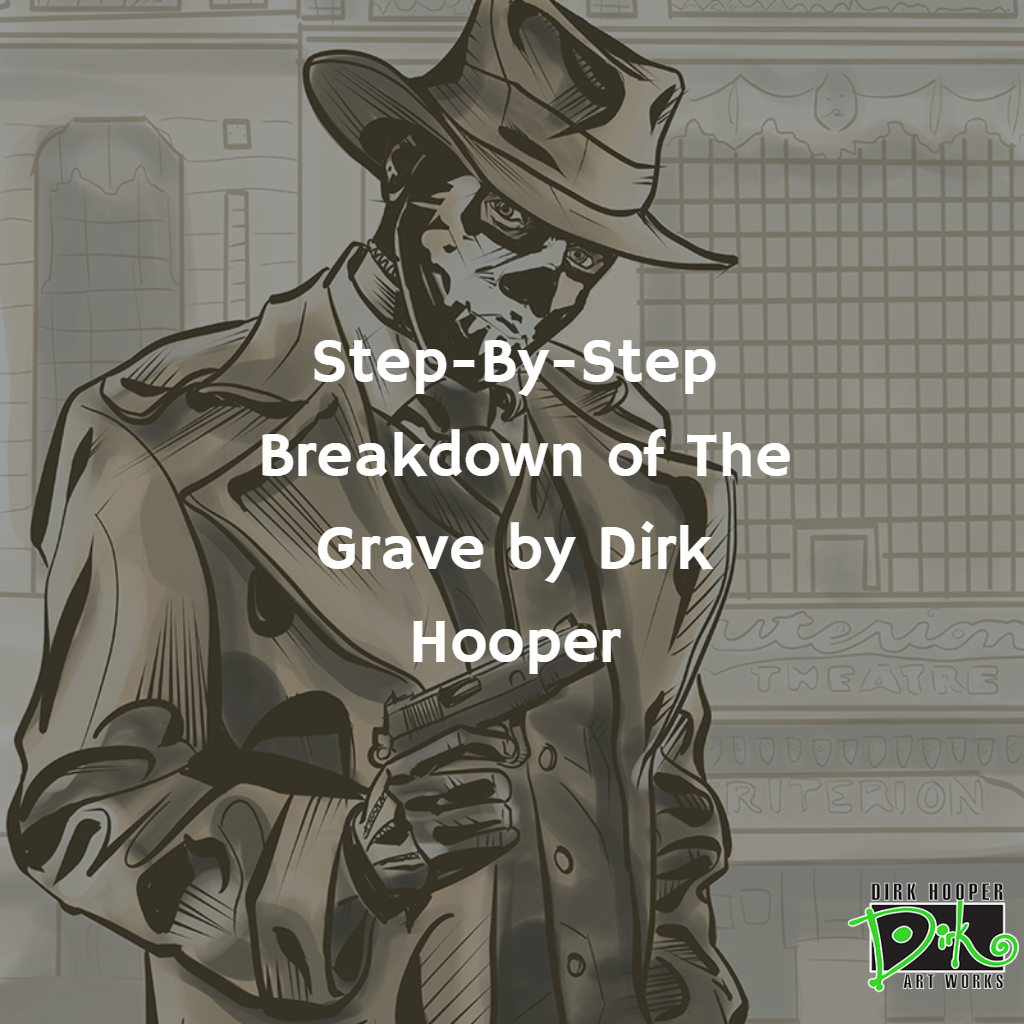
“The Grave” is a comic book character created by fellow Oklahoman Matt Price, and has been adapted into a movie. Matt asked some members of a local comic book Facebook group if they were interested in doing a promotional piece for “The Grave” a couple of months ago.
Since then I’ve seen several of my friends, including Shawn Wilson, Robert Henry, and Mike Kennedy, and many other artists I know and admire do their take on “The Grave.” I had to get into the fun.
Digital Comic Art
I did full-length comics about 20 years ago, but I took about 15 years off doing traditional art to pursue photography, writing, and build my business. If you’ve been following my artwork over the past couple of years, it’s mostly been digital, and I’ve been working on using different programs, and incorporating traditional methods, and straight digital work.
I started using Clip Studio Paint a couple of weeks ago to do the whole process and it’s really set me free. All the other programs (including PhotoShop and Illustrator) were not giving me the natural and simple results that’s I’ve seen with Clip Studio Paint.
To put it as simply as possible, the program just works. Instead of fighting with settings and making compromises, Clips Studio Paint fades to the background and I can concentrate on actually doing the art.
It’s also wonderful to be able to do the entire project in one program. This saves a lot of time, and more than a few headaches.
“The Grave” and Pencils
The Grave is set during the 1920s in Oklahoma City. So my first step was to do some research on fashion of the time and try to find some historical photos with downtown Oklahoma City.
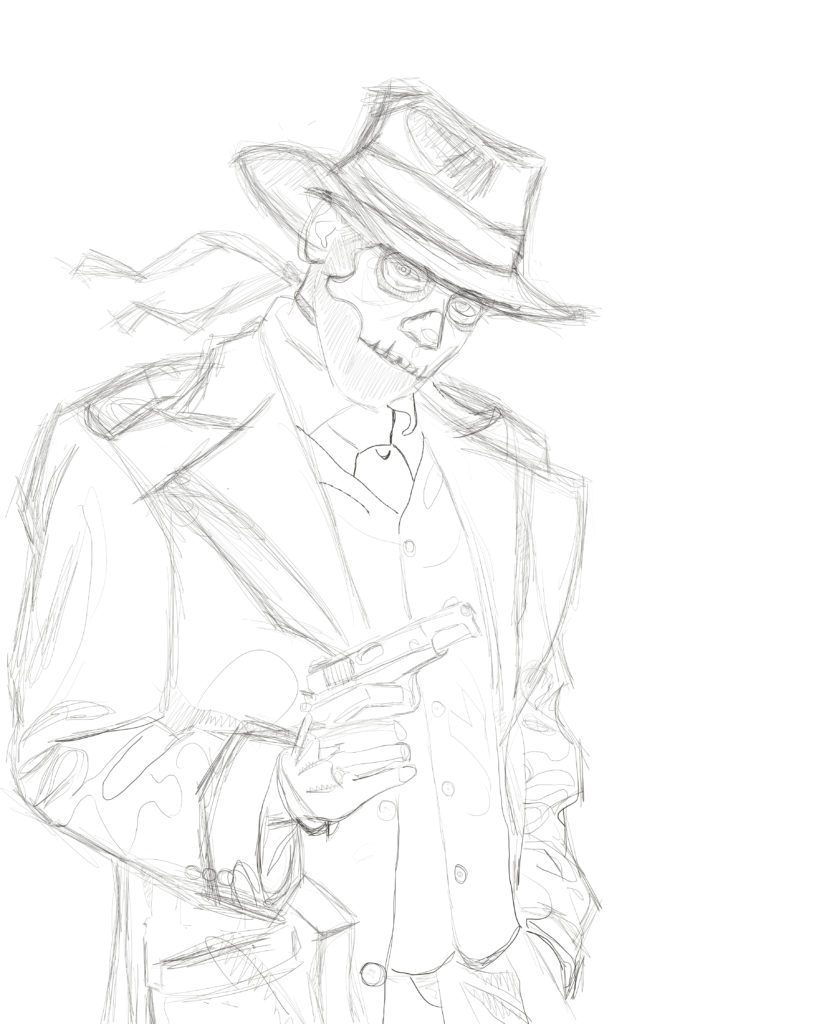
I started with pencils on the main figure. There was a lot of tooling around with the trenchcoat, and that fedora. I had a hell of a time with the fedora… those things are complicated to get right.
You can see what my original idea was with the mask, but I did something a little different when I inked it.
Inks
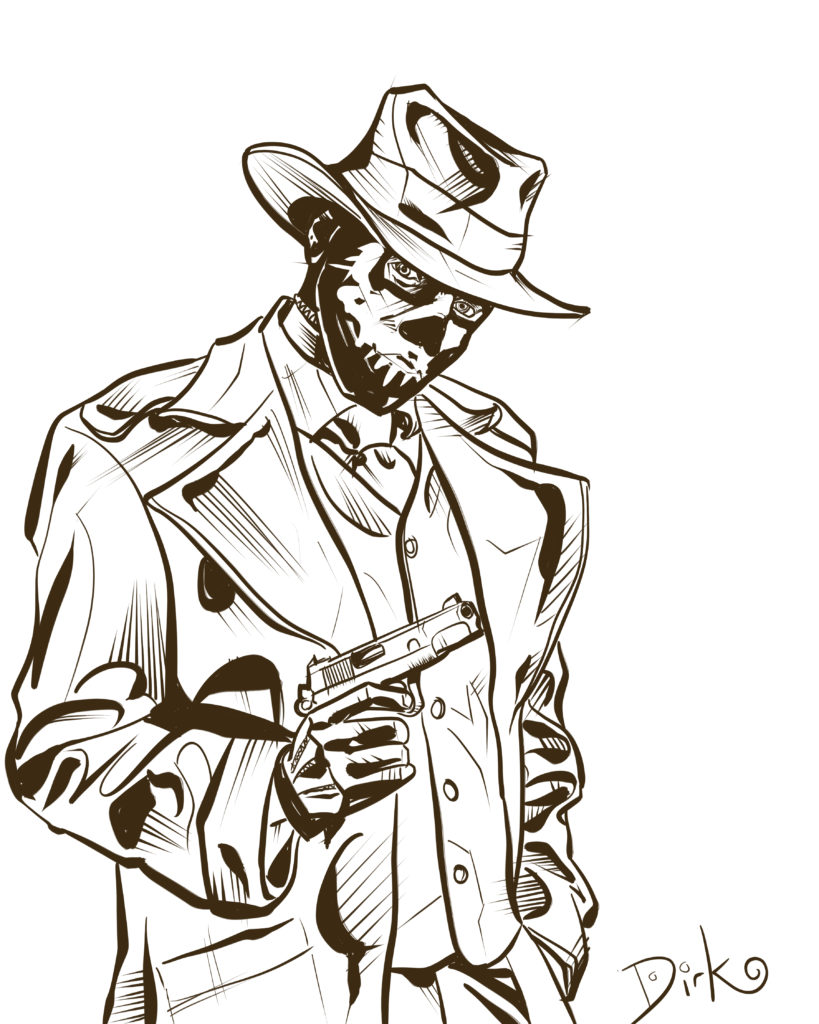
I feel like my inks really breathe life into my pieces. It’s the most fun part of the process to me. My heavy-handed style is different from most comic artists. It’s influenced by some really amazing artists from the 60s-80s, and my own evolution.
These digital inks are almost exactly what it would look like if I was doing the work with a #3 sable hair brush and india ink.
You might notice these “inks” are not in black. I intentionally chose that dark brown color to unify the monochromatic look that I was going for.
Background Inks
My next step was to do the background inks on a different layer. The benefit of doing the background separately is that you can control a lot more, if it doesn’t work right you can try again, and it allows you to do a more “complete” background that runs behind the figure.
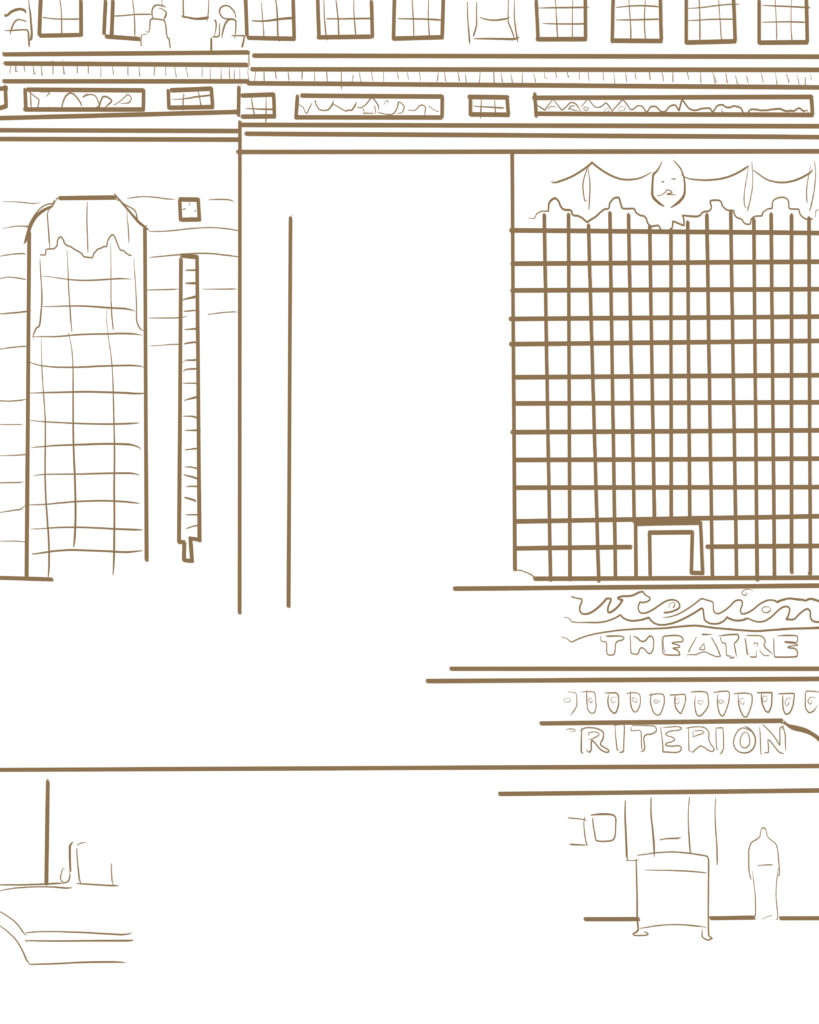
This is a super simple line art representation of a photo that I found of The Criterion Theater in Oklahoma City in the 1920s. I could have spent hours on this alone, but I freehanded much of it. The lines are minimized so that it wouldn’t distract from the main figure.
Figure Flats
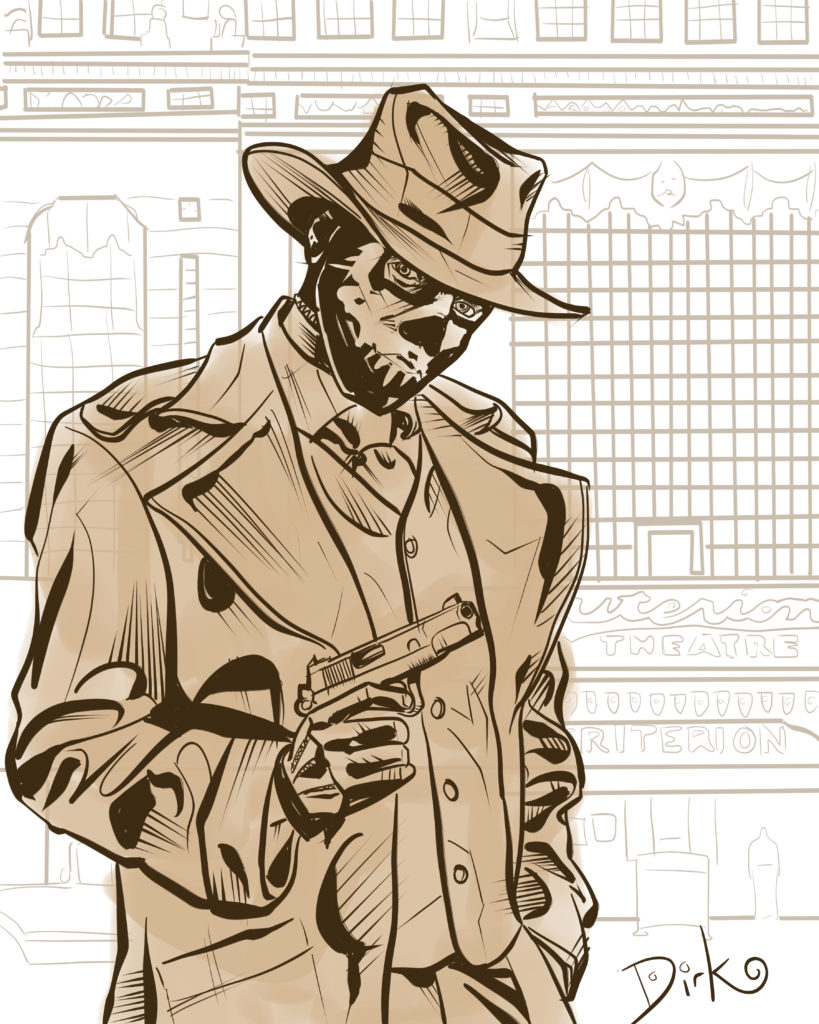
I had been using the airbrush tool in PhotoShop to color until I tried the watercolor tool in Clip Studio Paint. Again that watercolor tool looked and functioned just exactly like it would in meatspace, so I’ve been using that lately.
This is what I call “flats” although it’s really not that. Even at this level there is some variation on the density of the color.
What I’m trying to do here is to just establish the overall base color of the figure.
Adding Shadows
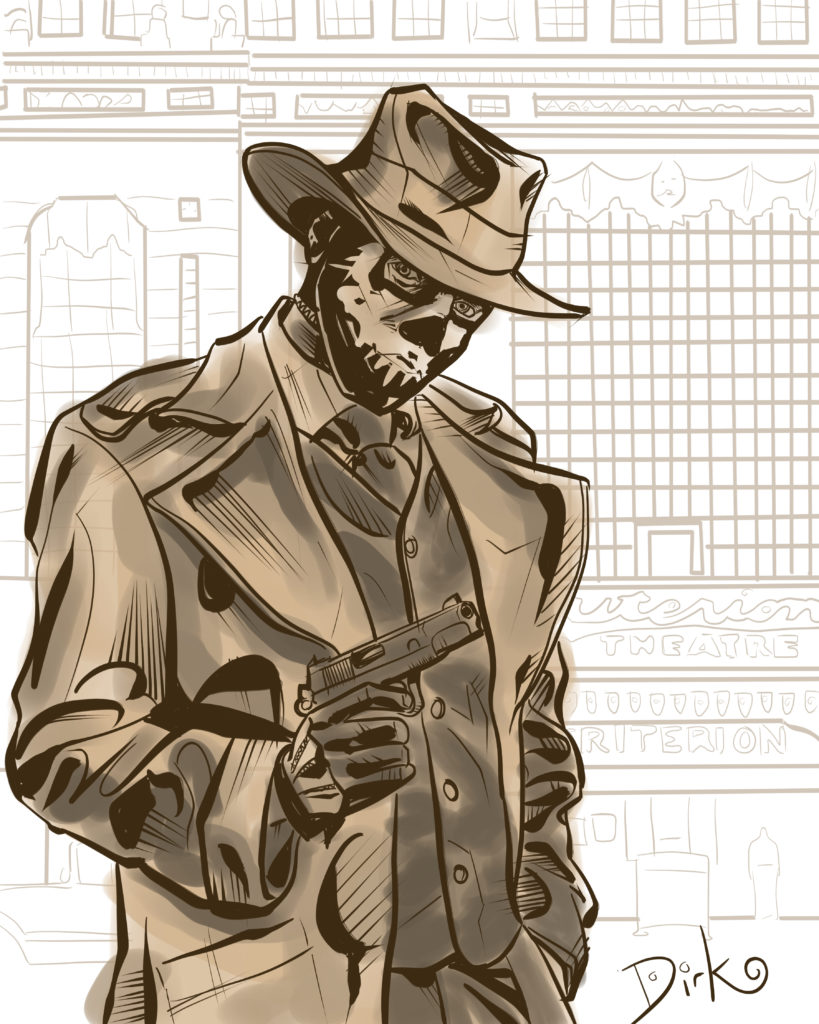
Here, I’m working on the shadows of the piece and creating some complexity in the color job.
The next two steps are to work in the highlights of the color, and to color the background.
The Finished Piece
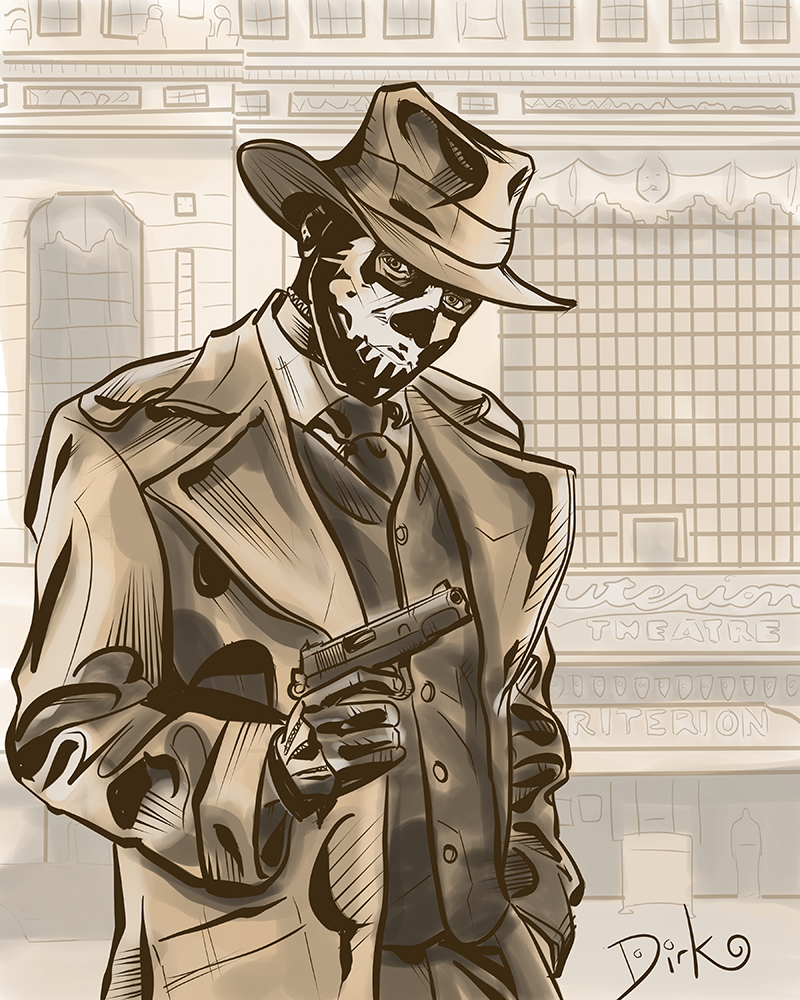
You can see that lightened parts of the main figure, particularly the mask, and I did some minimal work on the background. I also did some cleanup around the figure, because I like to work sloppy!
Hopefully you like the way it turned out. This is one of the most complex pieces I’ve done digitally. I’m happy to see that it all came together.
This piece was completed in record time. Fast is good for me, because faster means that I can do more artwork.
Hey, are you interested in “The Grave?” Here is a link to The Grave Facebook Page and The Grave Movie. Please tell them Dirk sent you!
Finally, tell me what you think of the piece or the process in the comments section below.
RT @DirkHooper: New! Step-By-Step Breakdown of The Grave by Dirk Hooper | Dirk Hooper Fetish Photographer https://t.co/kFTI5Xa7p8
#ComicAr…
RT @DirkHooper: New! Step-By-Step Breakdown of The Grave by Dirk Hooper | Dirk Hooper Fetish Photographer https://t.co/kFTI5Xa7p8
#ComicAr…
RT @DirkHooper: New! Step-By-Step Breakdown of The Grave by Dirk Hooper | Dirk Hooper Fetish Photographer https://t.co/kFTI5Xa7p8
#ComicAr…
RT @DirkHooper: New! Step-By-Step Breakdown of The Grave by Dirk Hooper | Dirk Hooper Fetish Photographer https://t.co/kFTI5Xa7p8
#ComicAr…
RT @DirkHooper: New! Step-By-Step Breakdown of The Grave by Dirk Hooper | Dirk Hooper Fetish Photographer https://t.co/kFTI5Xa7p8
#ComicAr…
New! Step-By-Step Breakdown of The Grave by Dirk Hooper | Dirk Hooper Fetish Photographer https://t.co/JD8VmTlmnH https://t.co/pNq4FUvpnE
RT @eroticafemdom: New! Step-By-Step Breakdown of The Grave by Dirk Hooper | Dirk Hooper Fetish Photographer https://t.co/JD8VmTlmnH https:…
New! Step-By-Step Breakdown of The Grave by Dirk Hooper | Dirk Hooper Fetish Photographer https://t.co/JD8VmTlmnH… https://t.co/6jzTa7mlp6